Spotting and scoring long range matches
Operations in the target pits will be managed by one or more range officers (called a Pit Boss). Any instructions
given by the Pit Boss should be
followed even if they differ from the course of fire (COF) or the information below.
Targets are raised and lowered by hand based on instructions from the Pit Boss. Generally, targets will be placed
at half-mast to indicate readiness
to proceed. Targets are fully raised when a shooting stage begins and when spotters are in place to identify impacts.
Targets are completely lowered
if the pit crew is not ready to continue. In practices, targets are usually pulled and marked after every shot,
and the next shot occurs with a spotter
in place. In matches, they are generally pulled after each stage, which can be one shot or many, and spotters
are removed before the next stage
When pulling targets, the best way to identify bullet impacts is to watch the berm. After there is an impact
in the berm behind your target, you can
look up at the target to locate the impact.
Spotters. There are 3 sizes of spotters: small (1), medium (3) and large (5). Small spotters are used
at 200 and 300 yard distances, medium
spotters are used at 425 (barricade), 500 and 600 yard distances, and large spotters are used at 800, 900 and 1000
yard distances. 
Spotters are either black on one side and white on the other, or red. The black side of spotters is
used to mark bullet impacts that miss the designated target area; the white side of spotters is used
to mark bullet impacts that are within the designated target area. Red spotters are used to mark
multiple bullet impacts that are within a space that can be covered with a single spotter.
Unless using a red spotter to mark multiple hits, there should be a spotter for each impact. If you
do not have enough spotters of the correct size, use a spotter of another size so that all impacts are
marked.
Scoring. General rules for scoring are listed below. Different courses of fire and/or stages may
have variations in how impacts are scored. Variations will be stated in the COF and/or on the
score sheet.
If an impact breaks the line separating different target rings, in general the higher ring value will
be used.
If there is a cross-fire from a different shooter, the assigned shooter will score the best values
among the impacts. If the assigned shooter fires extra rounds, the shooter will score the worst
values (and in some cases may be disqualified from the stage or match).
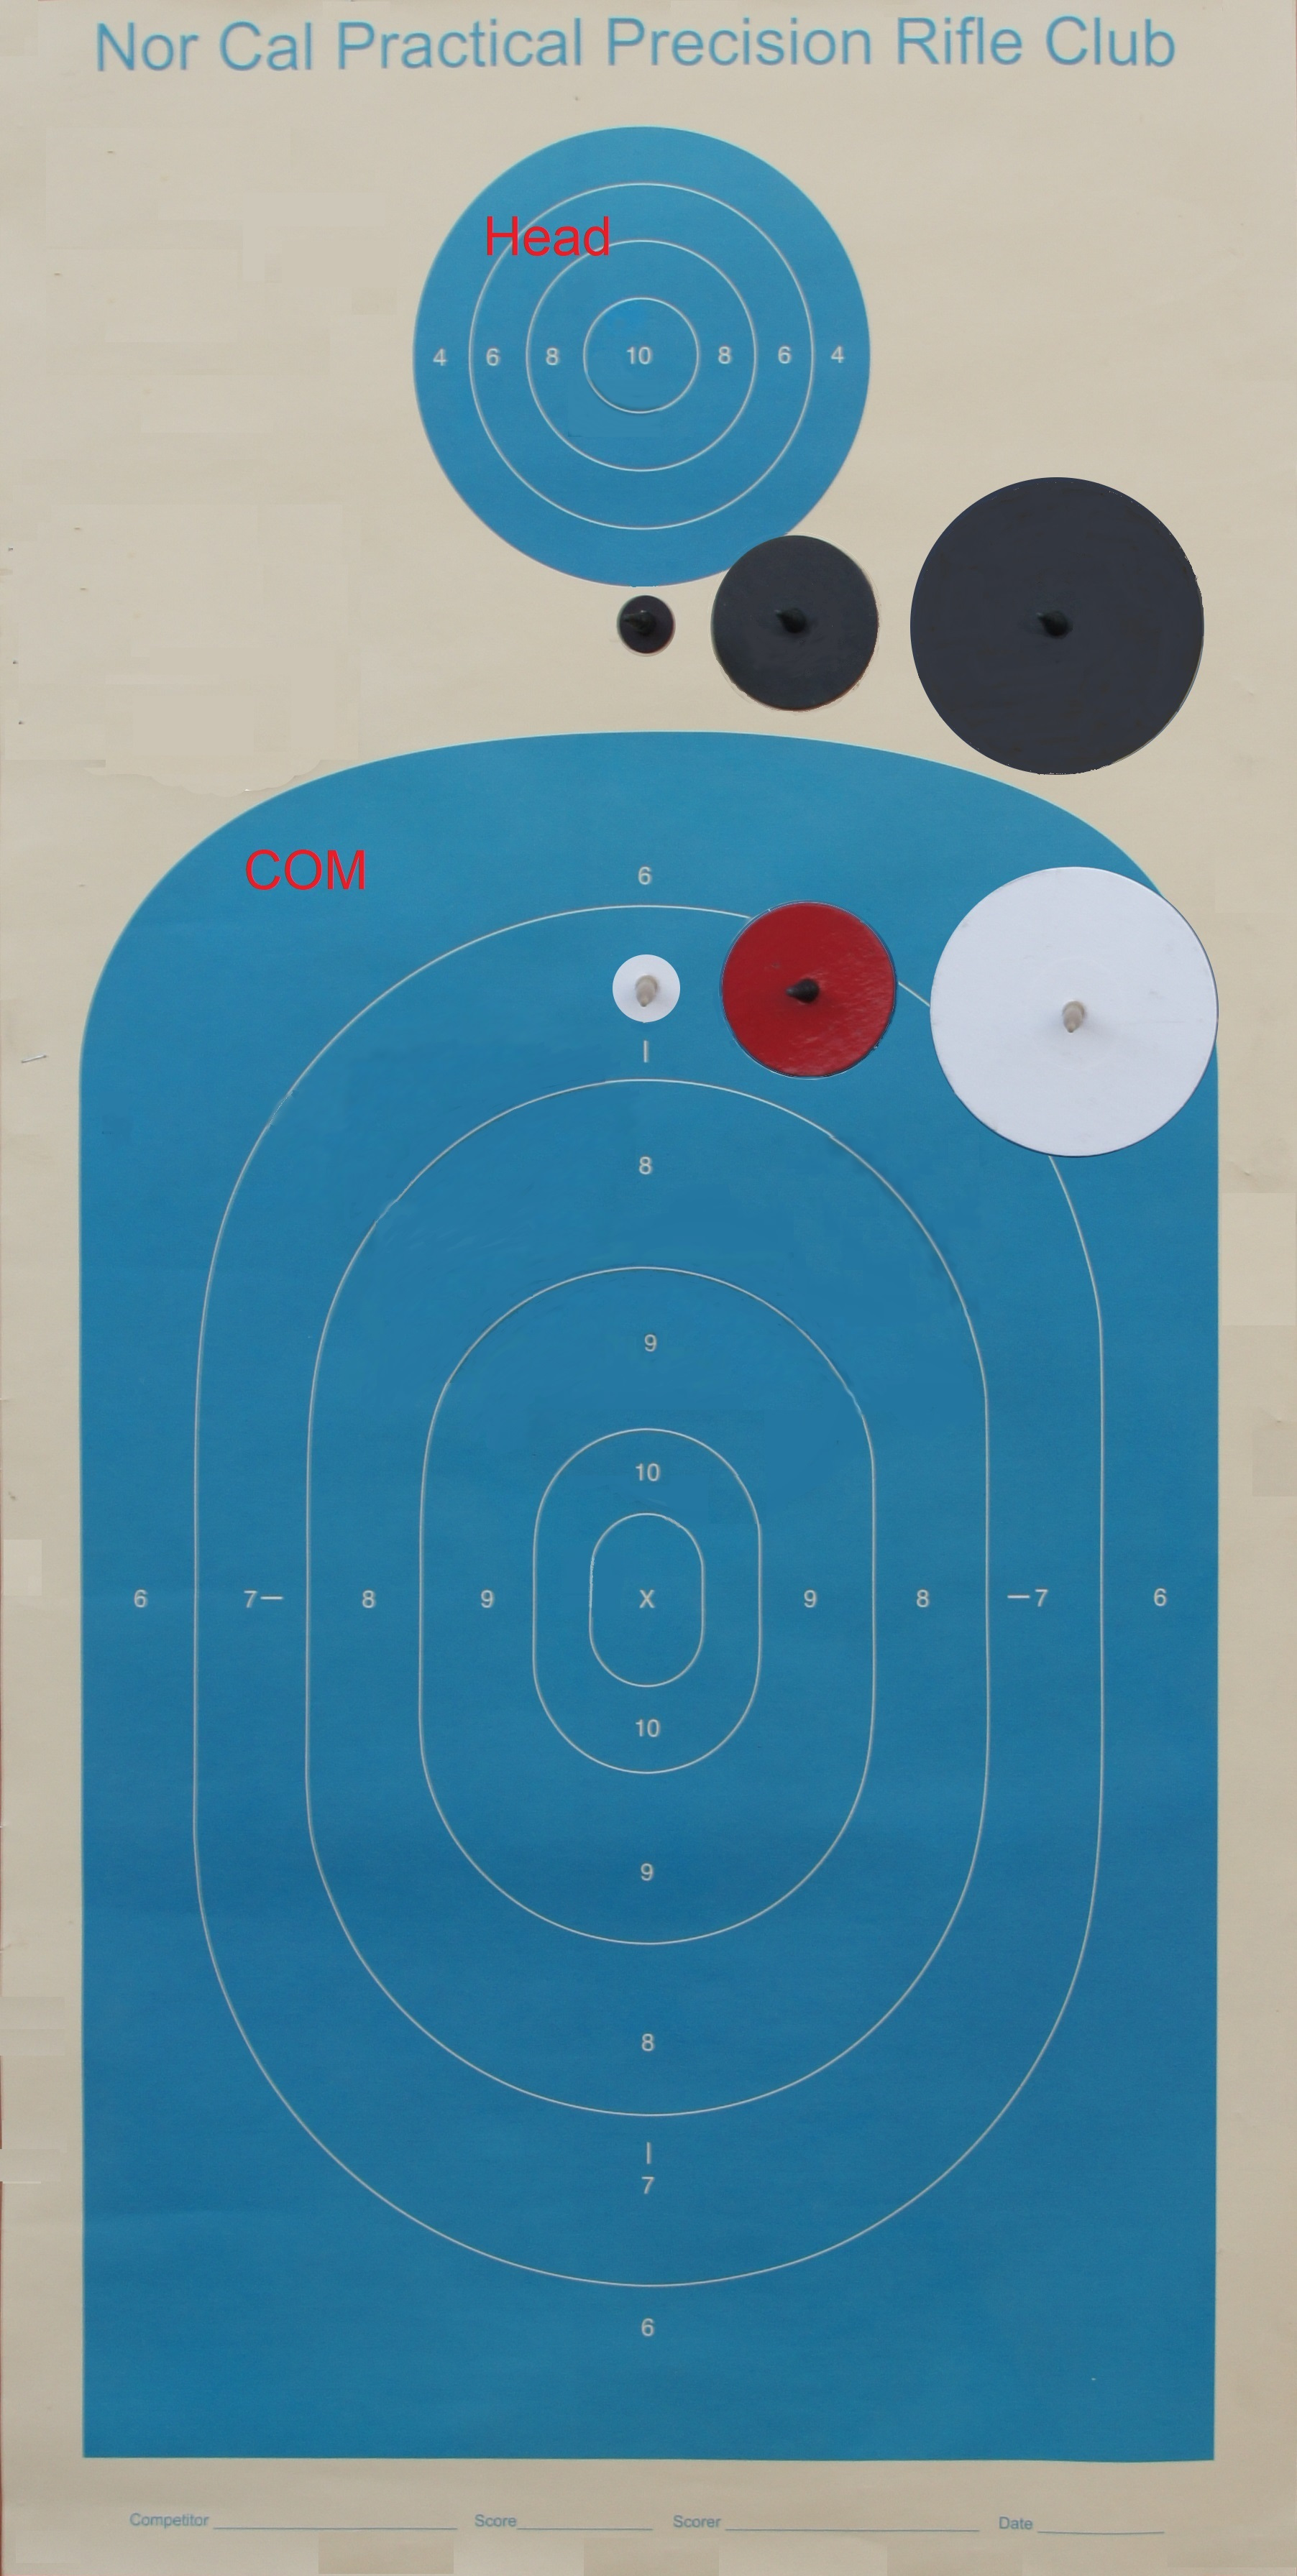
The top target, or head, can be scored in different ways, depending on the COF. In some COFs, it
is simply scored as the ring value (4 through 10). In other COFs, it may have an orange circle
attached and impacts in the orange circle will have 10 value and impacts in the blue in will have a
5 value. In some COFs, any impact in the blue will have a 10 value.
The main target, or center of mass (COM) is generally scored based on ring value.
Some COFs will also use other target components, such as Shoot-N-C, orange dot or hostage
targets. These will be scored as described in the COF and/or score sheet.
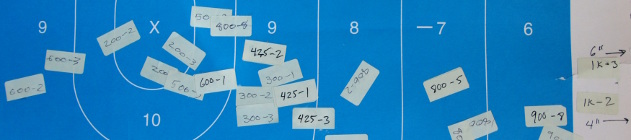
Pasters and Target Marking. Pasters are used to cover bullet impacts on the target after each stage. Sometimes,
pasters will be pre-printed
with stage and shot number. If you do not have pre-printed pasters, you should label blank pasters with stages
and shot numbers. Whenever
possible, impacts should be labeled with pasters showing the stage and order of shots fired. If impacts are outside
of the target paper, pasters
should be used at the edge of the target paper with a note describing the approximate location of the impact. For
example, an impact 6 inches
off the right edge of the target can be identified with a paster on the right edge of the target paper with 6
and an arrow to the right written on
the target paper. When the COF has been completed, targets should be rolled up with the target/paster side in,
with the shooter's name and
final score written on the outside
.
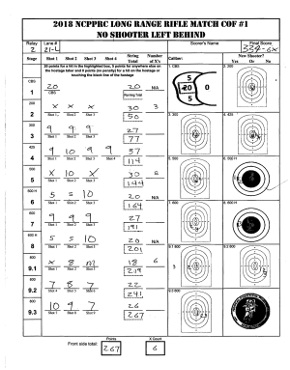
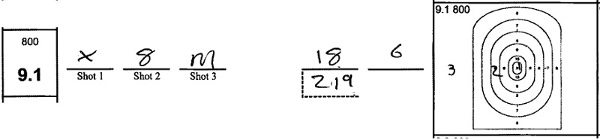
Score sheet. There are 2 sections of the score sheet, the score tally and the impact map. The
score tally will show point values for each shot by stage. The blanks in the score tally should
be filled in as shots occur, either with the point value, the letter X for an impact in the X ring,
or the letter M if the impacts misses the designated target area. In tallying the score, an X is
scored as a 10 value and the number of impacts in the X ring are tallied as a tie-breaker.
Where possible, the approximate location and order of the impacts should be shown
in the impact map.
rev 1/2019

